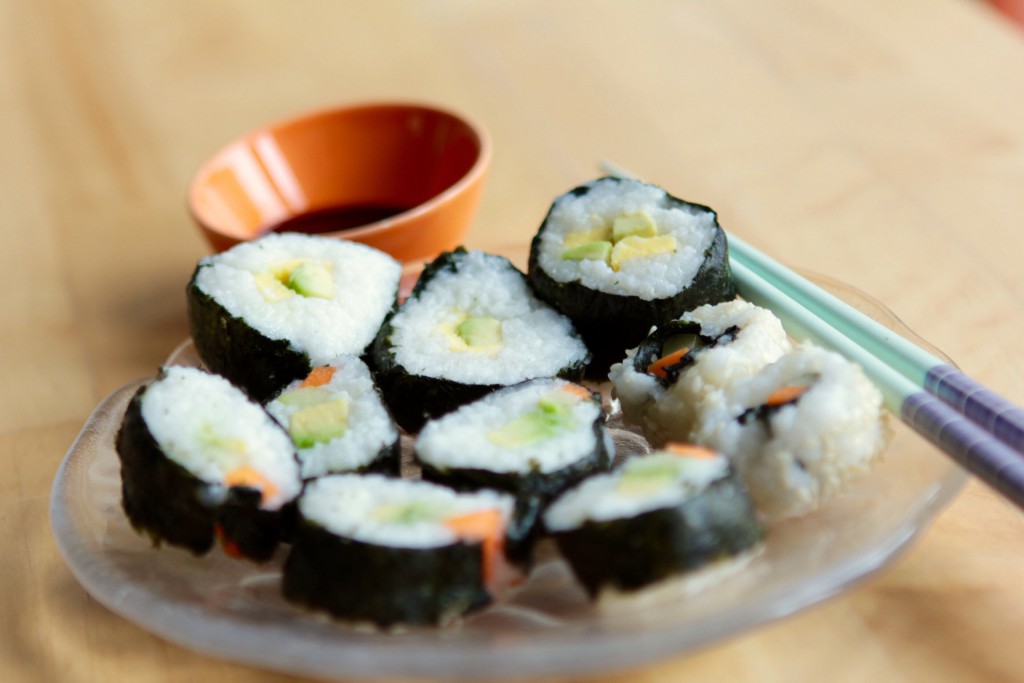
If you are an experienced sushi maker you might want to skip this article, as it might make you cringe. If, on the other hand, you have never dared to even think of making sushi yourself, please stick with me! I was once in the same group of non-sushi-skills-believers (that was until two weeks ago) but have since then made a discovery that has changed my sushi eating habits for good: making sushi is not that hard!
Now I have to admit that I’m everything but a perfectionist and my sushi might not always look pretty or perfectly shaped (I obviously used my best pieces for the picture), but I think I did a pretty good job at making something that resembles sushi and tastes exactly like sushi. It will take about 45 minutes to make (including letting the rice cool).
Ingredients (serves 2):
– 250 grams of sticky rice / sushi rice
– 350 ml water
– 2 table spoons of rice vinegar
– 1 egg
– 2 carrots
– half a cucumber
– half an avocado
– 3 Nori leaves (dried seaweed)
Put the rice and the cold water in a pan, add a pinch (or two) of salt and bring to boil. Leave boiling for 10 minutes, you might want to stirr with a fork every few minutes. Now turn off the heat and leave the pan with the lid on for 15 minutes. Once your rice is done, mix it with the rice vinegar and scoop it onto a plate. Flatten it out with a fork and refrigerate until it has cooled down.
In the meantime, beat the egg with a fork and add some salt. Heat up some oil in a steel-pan and pour the egg in the pan; bake into a mini omelette in approximately 5 minutes. When done, cut it into long, thin strips.
Cut the carrot, cucumber and avocado into thin strips as well.
Once the rice is totally cooled down, you’re ready to start the sushi building! Now this part might upset the real sushi masters, but the way I make it doesn’t require a bamboo-mat or any other complicated accessories. Just take the Nori and put with the rough side up on a cutting board. Take some rice and spread with a fork over the Nori, a thin layer is enough. Make sure you leave about two centimeters of empty space (so without rice) on one side of the Nori; this makes the sticking together part easier. Now put some strips of your filling onto the middle of the rice, into a long, thin stretch from one side to the other, parallel to the part of Nori which is still empty. Then start rolling from the ‘rice side’ of the Nori, firmly pressing the rice, until you have a nice sushi roll. With some water, moisten the last bit of Nori and stick it onto the roll. Now just cut out 2-centimeter parts out of the large roll; you have made your own sushi!
To make sushi with rice on the outside (uramaki), like the two on the picture, you start by putting rice on the cutting board (you can use plastic foil over the board to prevent sticking). Now put a leaf of Nori on top of the rice and add the filling in the middle and roll the whole thing up, like you did with the other sushi. You can add some sesame seeds on the outside for a more finished look.
Now, that wasn’t so bad, was it? And think about all the money you saved by making your own instead of ordering! Of course you can vary by using any filling you want, like raw fish, surimi or shrimps.
Serve the sushi with some soy sauce, wasabi and ginger. Itadakimasu!
